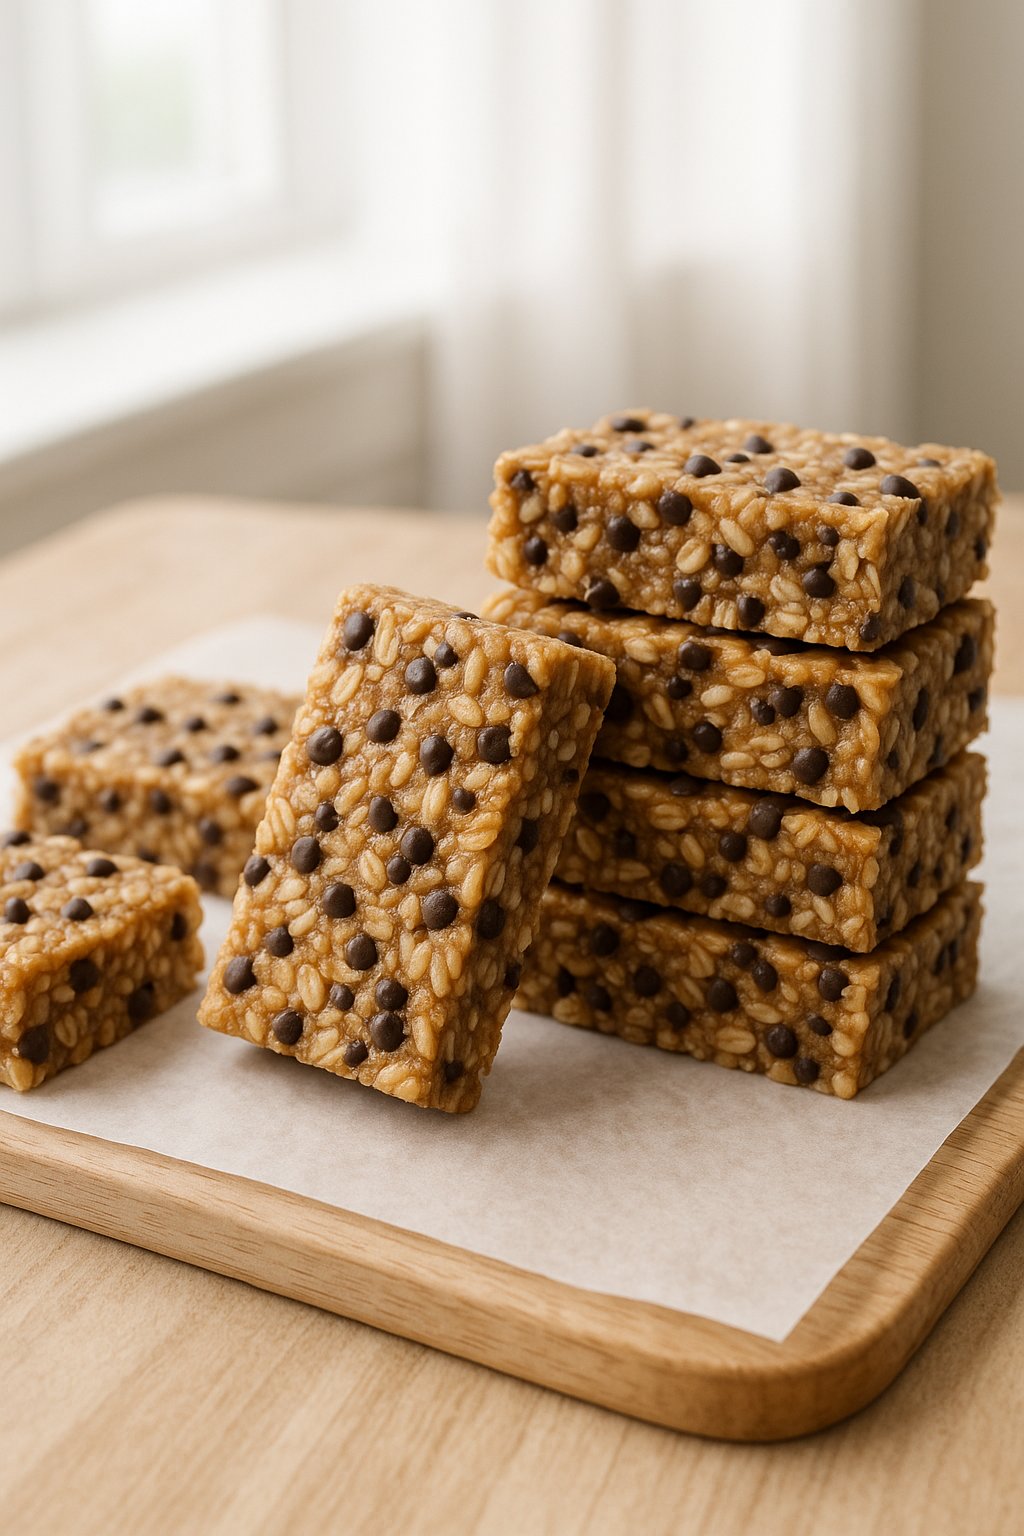
Chewy No-Bake Granola Bars
Homemade granola bars usually go one of two ways: they crumble into a bowl of loose oats the moment you pick one up, or they are so sticky they cannot be handled at all. Both are ratio and technique problems, and both are solvable.
Twenty-five minutes, one pan, no oven. Twelve bars that hold together in a lunchbox.
Boil the Syrup for a Full Minute
This is the step that decides whether the bars set, and it is the one most recipes gloss over.
Peanut butter, honey, and butter melted together make a thin, runny syrup. Poured over oats at that consistency, it coats them but never firms up properly, and the bars stay soft and fall apart.
Letting the mixture bubble gently for one full minute drives off some water and concentrates the sugars. As it cools, that more concentrated syrup sets much firmer — it is the same principle behind candy making, just at a very mild stage. One minute by the clock, not by feel.
Do not go much beyond that. Two or three minutes of boiling starts pushing the sugar toward hard-crack territory and the bars become tooth-breaking rather than chewy.
Toast the Oats
Eight to ten minutes in a dry skillet, stirring, until they smell nutty and darken a shade.
Raw rolled oats taste papery and slightly raw, and in a no-bake bar there is no oven stage to fix that later. Toasting develops nutty, roasted flavours through the Maillard reaction and dries the oats slightly, which helps them stay crisp rather than going soft against the syrup.
It is ten minutes and it is the difference between bars that taste homemade in a good way and bars that taste like uncooked cereal.
Press Harder Than You Think
The third thing. These bars hold together through compression as much as through the syrup.
Use the flat bottom of a measuring cup or a glass, work from the centre outward, and lean on it. The surface should end up tight, dense, and glossy — not just level. A gently patted-down mixture will crumble; a properly compacted one cuts into clean bars.
If the mixture sticks to the cup, lay a piece of parchment over the top and press through that.
Ingredient Notes
- Old-fashioned rolled oats (2 1/2 cups). Rolled, not instant. Instant oats are cut finer and pre-steamed; they absorb the syrup and turn into a dense paste rather than staying distinct. Steel-cut oats are the opposite problem — they stay hard and raw.
- Creamy peanut butter (1/2 cup, the stirred kind). Conventional peanut butter, not natural separated. Natural peanut butter’s oil separates out and the bars will not set firm; the stabilizers in conventional peanut butter keep everything bound. This is one of the cases where the more processed product genuinely works better.
- Honey (1/2 cup). The main binder and sweetener. Maple syrup works but is thinner and gives a slightly softer bar — boil it a few seconds longer if you substitute.
- Butter (3 tbsp). Richness, and it helps the bars release from the parchment.
- Salt (1/4 tsp). Not optional. Sweet bars without salt taste flat and cloying.
- Mini chocolate chips (1/2 cup, optional). Mini rather than standard — they distribute much better through a mixture this dense.
Method
Line an 8×8 pan with parchment, leaving overhang on two sides.
Toast the oats in a dry skillet over medium heat, 8–10 minutes, stirring often. Tip them into a large bowl.
Melt the peanut butter, honey, and butter together, stirring until smooth, then let it bubble gently for one full minute.
Off the heat, stir in the vanilla and salt.
Pour the hot syrup over the toasted oats and stir until every oat is coated. Work reasonably quickly — the syrup thickens as it cools and gets harder to distribute.
Cool 5 minutes before adding chocolate chips, if you are using them. Added to the hot mixture they melt into streaks. Five minutes is enough for them to hold their shape, mostly.
Press firmly into the pan, centre outward, until tight and glossy.
Refrigerate at least 1 hour, until completely firm.
Lift out by the parchment and cut into 12 bars, wiping the blade between cuts.
Troubleshooting
- Crumbling apart. Not pressed firmly enough, the syrup was not boiled, or natural peanut butter was used.
- Too soft and sticky. Syrup under-boiled, or they were cut before chilling fully.
- Rock hard. Syrup boiled too long. Keep it to one minute.
- Chocolate chips melted into streaks. Added while the mixture was still hot.
- Dry and bland. The oats were not toasted, or the salt was left out.
- Stuck to the pan. Parchment is not optional here.
Variations
- Nut-free. Sunflower seed butter substitutes directly and is the standard swap for school lunchboxes.
- Almond butter. Works well; use a conventional stabilized one for the same reason as the peanut butter.
- Add dried fruit. 1/2 cup of raisins, chopped dates, or dried cranberries. Reduce the oats slightly to compensate.
- Add seeds. 1/4 cup of chia, flax, or sunflower seeds for extra texture and nutrition.
- Coconut. 1/2 cup of shredded coconut, toasted along with the oats.
- Chocolate-dipped. Dip the bottoms of the finished bars in melted chocolate and set on parchment.
- Protein bars. Add a scoop of protein powder to the oats and an extra tablespoon of honey, since protein powder dries the mixture out.
- Double batch. Use a 9×13 pan and double everything, for 24 bars.
Storage
Refrigerated in an airtight container with parchment between the layers, these keep for 2 weeks. They are best kept cold — at room temperature they soften noticeably over a few hours, and in a warm kitchen they can go quite sticky.
For lunchboxes, that softening is worth knowing about. They will be fine by lunchtime but a bar wrapped individually holds its shape better than one loose in a bag.
They freeze for up to 3 months, wrapped individually. They thaw in about fifteen minutes at room temperature, and eaten semi-frozen they are excellent — firm and chewy rather than soft.
Wrapping them individually is worth the five minutes. It makes them genuinely grab-and-go and stops them fusing back into a slab in the container.
When to Eat Them
Lunchboxes, hiking, gym bags, the drawer at work. They are more substantial than a cereal bar and far cheaper than anything comparable in a packet, and you know exactly what is in them. As a breakfast on the way out the door they are reasonable; as a mid-afternoon thing with coffee they are very good.
Questions
Why are my granola bars falling apart?
Almost always insufficient pressing, or the syrup was not boiled for a full minute. Both are needed.
Can I use natural peanut butter?
Not with good results — its oil separates and the bars will not set firm. Use the conventional stirred kind.
Can I use maple syrup instead of honey?
Yes. It is slightly thinner, so boil it a few seconds longer.
Do I have to toast the oats?
Not for the bars to work, but untoasted oats taste raw and papery. It is ten minutes for a large improvement.
How long do they keep?
Two weeks refrigerated, three months frozen.
Can I make them without chocolate chips?
Yes, they are listed as optional. Dried fruit or seeds are good alternatives.
Why did my chocolate chips melt?
The mixture was still too hot. Let it cool five minutes before folding them in.
Can I use a different pan size?
An 8×8 gives bars of a good thickness. A 9×13 with the same quantity gives thin, fragile bars — double the recipe if using one.
Chewy No-Bake Granola Bars
Ingredients
Method
- Line an 8x8-inch pan with parchment, leaving an overhang on two sides so you can lift the bars out later.
- Toast the oats in a large dry skillet over medium heat for 8 to 10 minutes, stirring often, until they smell nutty and turn a shade darker. Pour them into a large bowl.
- Combine the peanut butter, honey, and butter in a small saucepan over medium heat. Stir until melted and smooth, then let it bubble gently for 1 full minute — this thickens the syrup so the bars set firm.
- Take the pan off the heat and stir in the vanilla and salt.
- Pour the hot syrup over the toasted oats and stir until every oat is coated. Let the mixture cool for 5 minutes if you are adding chocolate chips, then fold them in.
- Scrape the mixture into the lined pan. Press it down hard with the flat bottom of a measuring cup, working from the center outward, until the surface is tight and glossy.
- Refrigerate for at least 1 hour, until completely firm.
- Lift the slab out by the parchment and cut into 12 bars with a sharp knife, wiping the blade between cuts.